11. Transmitter Selection
By default in SeligSIM, the transmitter is selected automatically when
you select an aircraft. Use this Transmitter Selection window for
calibrating (Approaches 2 and 3 of
Getting Started: Part I), for checking
your eight axes, and for copying and editing a transmitter to make
customizations, e.g., expos and rates. To open it, click the
transmitter icon on any Fly Screen, or press T.
11.1. Calibrating
If you mapped your controller in the Mapping window (Approach 1), it is already calibrated, and you can skip this section. To recalibrate a mapped controller, return to the Mapping window and click Calibrate again.
For Approaches 2 and 3, the Calibrate button on the left is where you calibrate. That step is described on the Getting Started: Part II page.
If you click to calibrate and receive the popup “Cannot Calibrate”, see the related note in the troubleshooting section for the solution.
11.2. Transmitter Selection Windows
When you click on the Transmitter left menu button (or the transmitter icon) from one of the Fly Screens, you will see one of two different Transmitter Selection windows. It depends on your USB interface selection. Both are shown below. The first corresponds to a “Mapped - <device>” interface, a V1 interface, or your transmitter’s own USB name. The second corresponds to an FS One V2 interface.
Now here is the interesting thing: If you do not own a V2 interface (or have one, but not plugged in), you will never see the second case (“Universal Tx”) below. However, if you are using any type of V2 interface, then you will notice this ‘context sensitive’ nature of the two types of Transmitter Selection windows, depending on what interface you have selected from the previous Fly Screen.
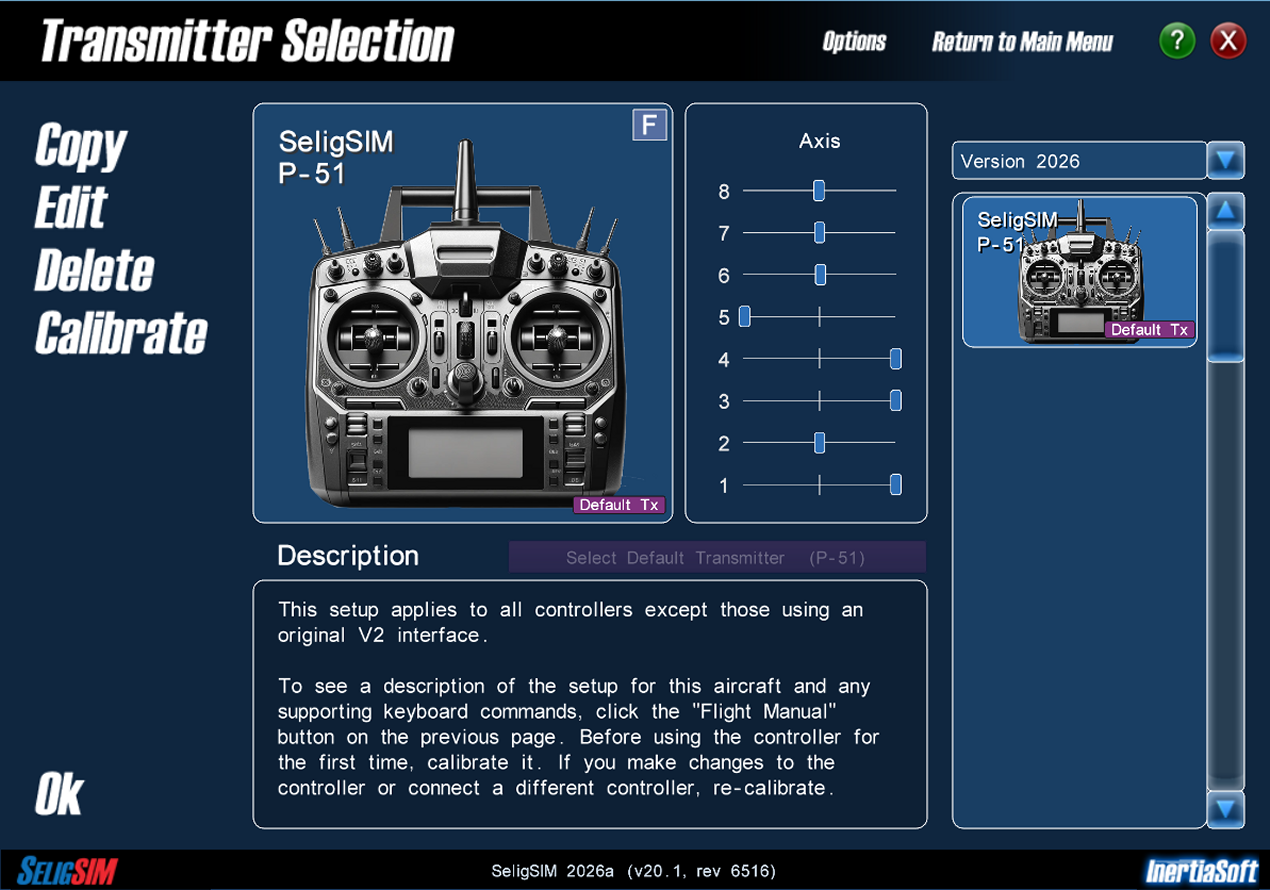
Transmitter Selection Window for a “Mapped - InterLinkDX” interface, with the P-51’s default transmitter selected. The same Tx icon style is used for a Mapped interface, a V1 interface, or your transmitter’s own USB interface (non-V2).

Transmitter Selection Window for an FS One V2 interface selection with the “Universal Tx” name.
Users with the V2 Interface
If you are using a V2 interface and the proper main icon (“Universal Tx”) is not shown, see the note from Getting Started: Part II. Calibrate needs the “Universal Tx” selected. With any other radio highlighted it says “Select Universal Tx First”.
Transmitter Is Automatically Selected
The proper transmitter for an aircraft is automatically selected when you select the aircraft. After that automatic selection, the transmitter has the controls described in the Flight Manual.
Technical Background - How it works under the hood.
When you select an aircraft, the simulator reads those files and finds out what transmitter to use. In that step, the transmitter is automatically selected for you.
Optional Methods (not recommended)
If you want to save your specific aircraft selection and custom transmitter selection and later reload that, see the note at the bottom of the page: Save/Load Flight.
Alternatively, if you really want to change this automatic behavior for all airplane selections, see Options | Auto-Load Radio/Controller.
Default Tx, Custom Tx, and the Select Default Transmitter Button
The transmitter icon carries a tag that tells you at a glance what you are flying with. A purple “Default Tx” tag means the airplane’s own transmitter is selected. A green “Custom Tx” tag means one that you created is selected.
Below the transmitter picture is the purple Select Default Transmitter button. One click returns you to the airplane’s own radio. When the default is already selected, the button is grayed out, as in the first figure above. For a custom transmitter, the Description box lists the transmitter’s name, the airplane, the stock transmitter it was copied from, the real USB device and the Mapped device it was created with, and the date.
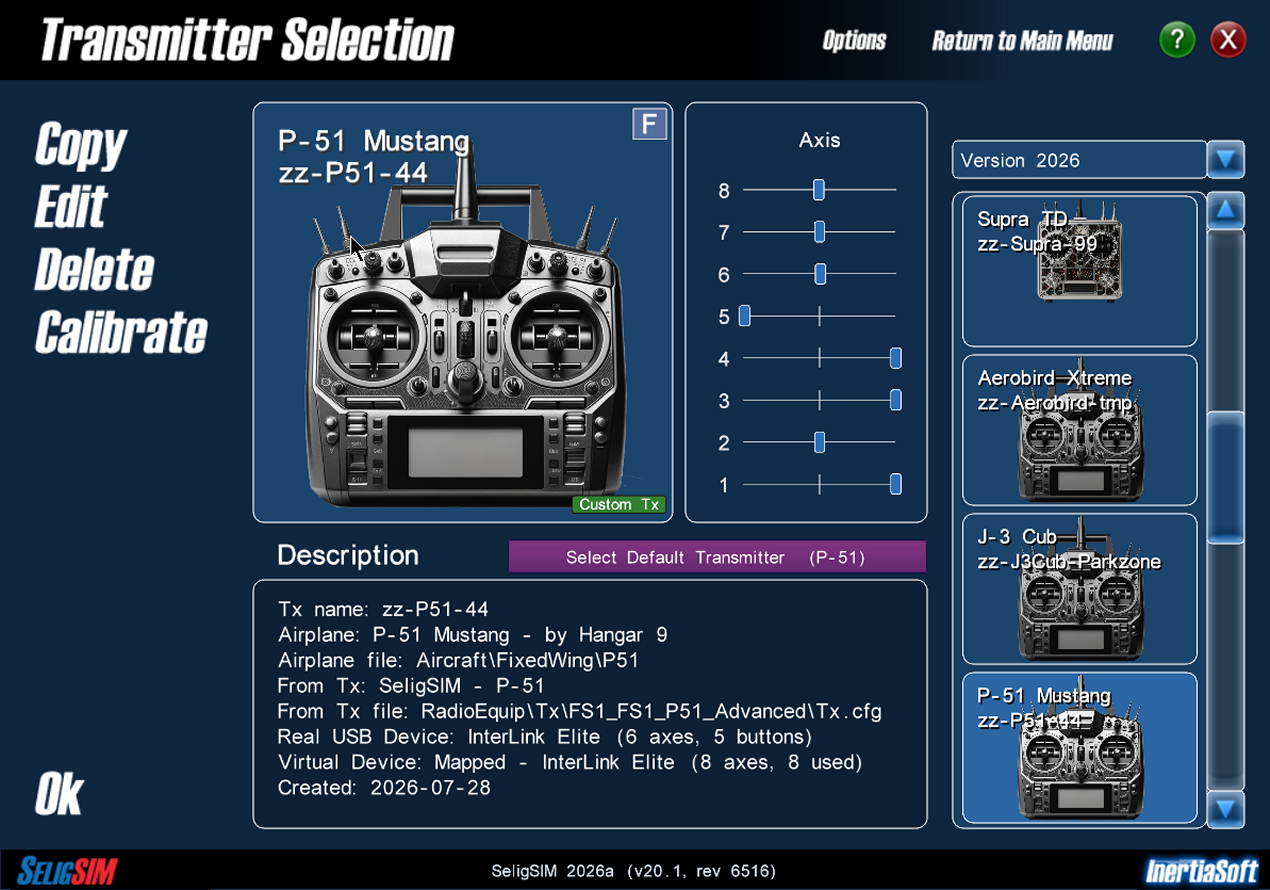
A custom transmitter selected for the P-51 (“Custom Tx” tag). The purple Select Default Transmitter button returns to the airplane’s default transmitter.
Finding a Transmitter
The dropdown at upper right picks the category of transmitters shown in the list below it:
Version 2026: the stock transmitters, one per airplane.
Recent: the transmitters you have actually flown, newest first, shown in amber.
User Transmitters: the ones you have copied and edited.
Free Flight: transmitters with the controls frozen, so the named airplanes fly like free flight models.
Tx (no programming): pass-through transmitters for Use Your Own Programming.
Press F to filter the list. Type a few letters of a name and the
list narrows as you type. If you get into one of the other
categories and want out, select Version 2026 again, or reselect the
airplane.
11.3. Copy, Edit, and Delete
On the main Transmitter Selection window, the left side buttons let you make a copy of a transmitter. Then you can edit that transmitter. You can also delete transmitters that you create, and a confirmation is asked first. Details of how to edit a transmitter are in another section.
Transmitter Auto-Selection Is Persistent
Suppose you do copy/edit a transmitter and use that for a certain airplane, say, the Extra 260. You may have even made a copy of the airplane and made edits to customize it. From the Fly Screen it shows your airplane and your transmitter with your custom name, e.g., “My Extra 260 Tx,” and the green “Custom Tx” tag. Suppose you flew that setup, then flew a different airplane, and then returned back to fly your custom Extra 260. When you pick that airplane, what transmitter is selected? It will be the default transmitter for that airplane (consistent with the technical background info given above). To fly with your custom transmitter, click on the transmitter icon and select your transmitter (it is in Recent and in User Transmitters). The Fly Screen should then show your custom selections.