9. Single Pilot Freestyle
This Fly Screen lets you pick an airplane and make other selections for flying around – freestyle. Generally speaking, a Fly Screen is any simulator window that includes a Fly button to launch a Flight Session.
To reach this window, click Single Pilot Freestyle from the Main Menu.
When you are ready to fly, at bottom left click Fly.
To reset the aircraft after a crash, press
Spacebarto restart to the starting position (“home”) or pressUto reset in place at the present location. You can also use the reset switch/controls on your transmitter if you are using at least a 7 channel transmitter/controller.To stop flying and return to this freestyle menu window, press
Esconce.
IfEscis then pressed a second time, the sim shuts down.
Further, pressingEscfrom any menu window will shut down the sim.
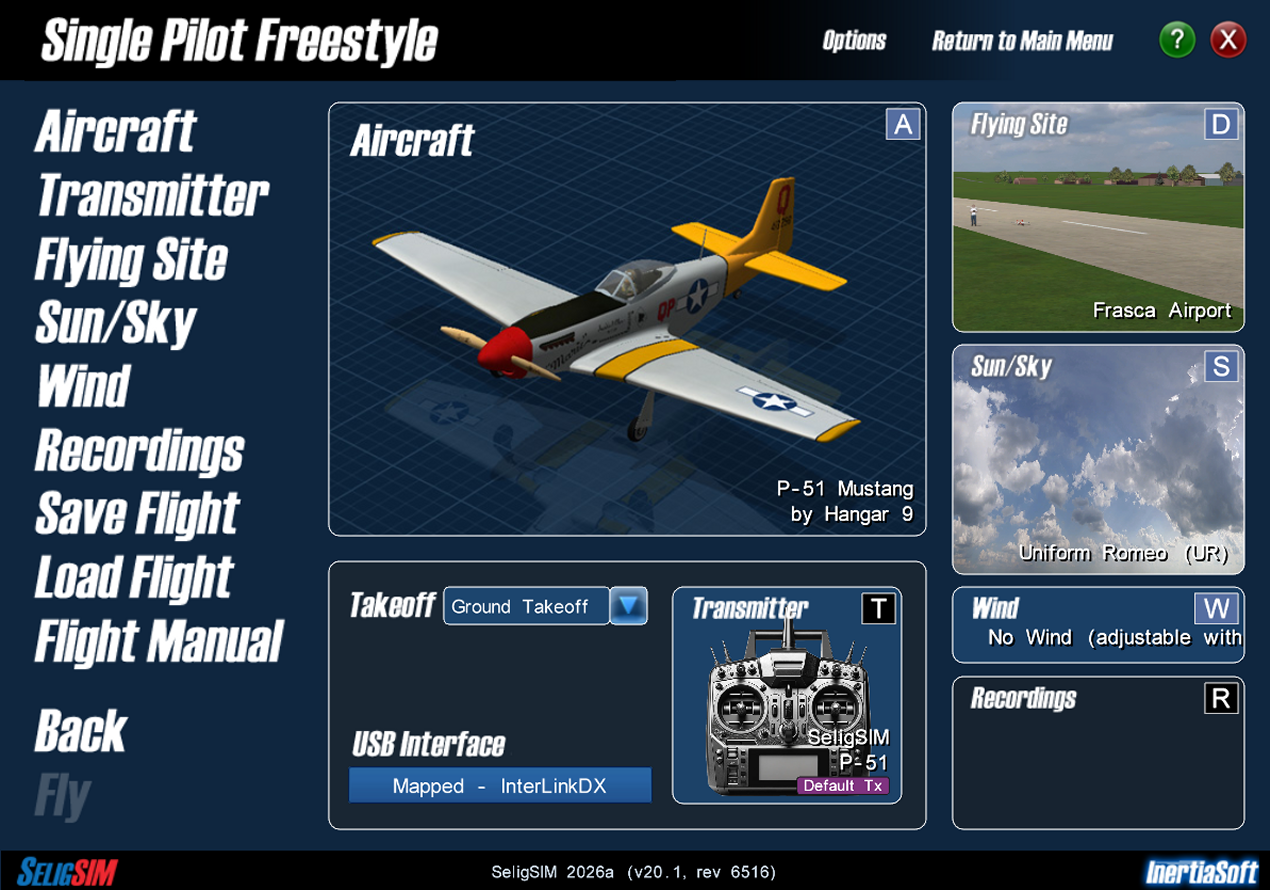
Fly Screen: Single Pilot Freestyle. The letter badges ( A,
D, S, W, T, R ) are the keys that open each
selection.
Important
To be able to fly, your transmitter Reset-To-Home/Reset-In-Place switches must be in the neutral position (centered if it is a 3-position switch). Otherwise, the sim will constantly read your transmitter as commanding a reset and the aircraft will be frozen in reset, the propeller may stutter with throttle, and gear may be up with the aircraft suspended. It is constantly being reset if that is what you see.
Aircraft Selection
Click on the large picture of the aircraft.
Or, click on Aircraft in the menu.
This shows you the Aircraft Selection window.
Transmitter Selection
At bottom middle pane, click on the picture of the transmitter.
Or, click on Transmitter in the menu.
This shows you the Transmitter Selection window.
From there you can also Edit or Calibrate your transmitter.The default transmitter selection is recommended – the selection that is automatically picked when you select the airplane. If you are unsure, go back and select the aircraft again. The appropriate transmitter with the airplane name will be selected automatically.
Note
If your USB interface is a “Mapped - <device>” from the Mapping window, it is already calibrated. Otherwise, calibrate before using a transmitter for the first time, and recalibrate if you swap transmitters or change the USB interface.
Tip: Automatic Transmitter Selection
The Transmitter Selection window is mainly used for calibrating. The actual transmitter setup for your airplane (“model memory” to use a term that applies to real transmitters) is selected automatically when you select an airplane. You can always go back to the Aircraft Selection window to have the sim reselect the correct transmitter setup. Leaving the Aircraft Selection window will then show the proper transmitter setup.
In summary, most of the time the Transmitter Selection window is only used for calibrating and not for actually selecting a transmitter which is done automatically!
USB Interface Selection
At bottom middle pane, click on the current interface name under USB Interface heading.
Pick your interface from the list: “Mapped - <device>” for a controller set up in the Mapping window, your transmitter’s USB name, or an FS One interface. See Getting Started: Part I.
Recalibrate, unless it is a Mapped device.
Take Off Method
At bottom middle pane, click on the dropdown Takeoff. This shows your Takeoff Options.
Select the method, e.g., ground takeoff, hand-launch, and so on.
If you select a hi-start or winch, check your towline settings in Options to ensure that you have a suitable line selected, i.e., one that has an appropriate strength and length for the selected aircraft.
Flying Site, Sun/Sky, and Wind Selections
Make your selections for the Flying Site, Sun/Sky, and Wind settings.
At right, click on the picture.
Or, click on the corresponding item in the menu.
Recordings Selection
Play back a recorded flight while flying your own aircraft.
At bottom right, click on the Recordings pane.
Save Flight Selections
Save a favorite flight configuration for convenient recall.
At left, click on Save Flight.
The selections for aircraft, transmitter, takeoff, flying site, sky, wind, and any second pilot settings are saved. Your recordings selections are not saved.
Load Flight Selections
Load a saved flight configuration.
At left, click on Load Flight.
Flight Manual
Learn about the transmitters/controllers and their configurations for each airplane.
At left, click on Flight Manual.
Key Commands While Flying
Keep the Key Commands visible for convenient reference while flying. Along with your controller, your keyboard input is the main way to interact with the simulator while you fly.
During a Flight Session, press / (the same key as “?”) to open
the Keyboard Shortcuts window. Type a word to filter it. Press
/ or Esc to close it. The menu bar at
the top of the screen also lists every command with its key.
Keyboard Shortcuts on this Screen
Everything on the Fly Screen has a key. A opens the aircraft
quick search, D flying sites, S sun/sky, W winds, T
the Transmitter Selection window, and R the Recordings
window. Once you have clicked a pane, F opens the quick search
for that pane. Enter is Fly, so from a cold start Enter,
Enter takes you into a flight. Press and release Alt and small labels
appear beside everything reachable from the keyboard, the way Windows
does.
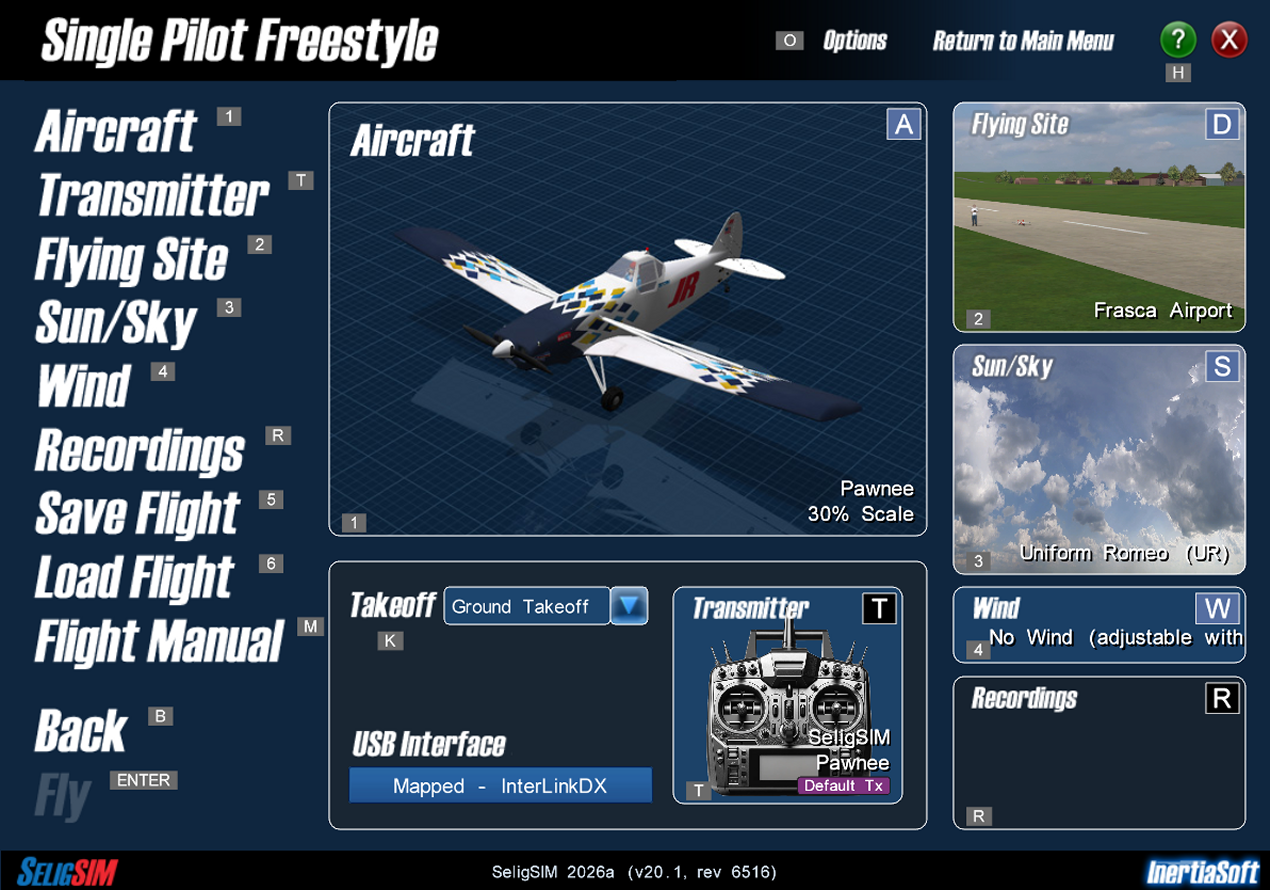
Press and release Alt and the keytips appear.